
Step-by-Step Guide for Events/Courses Vendors
Welcome to the WSHAsia Events/Courses guide for vendors! Follow this guide to set up your account, list your first event, and manage your earnings.
- Phase 1: Account Setup & Verification
- Phase 2: Listing Your First Event/Course
- Phase 3: Managing Orders & Commission
- Phase 4: Withdrawals & Payments
Phase 1: Account Setup & Verification
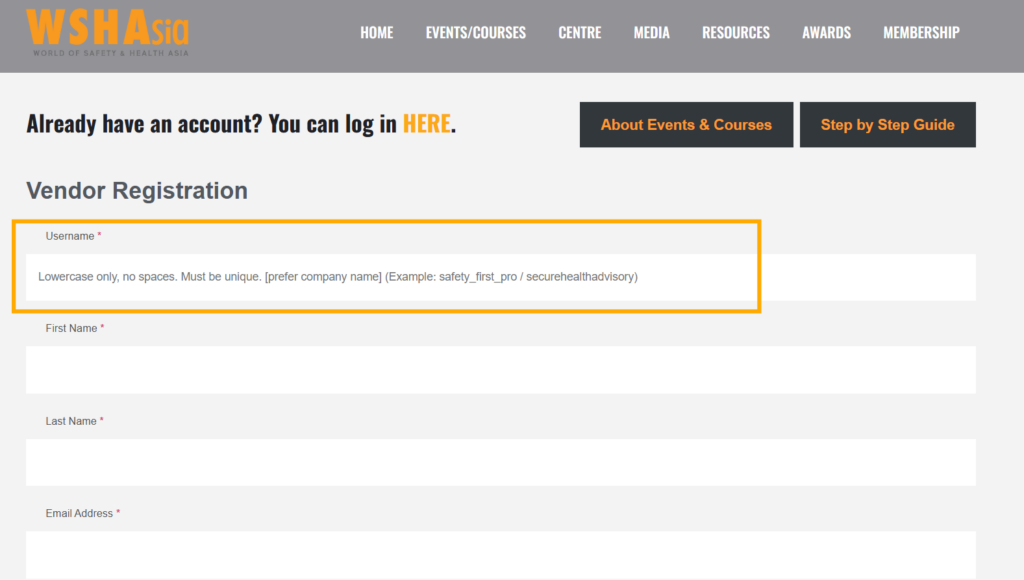
1. Registration
Visit our registration page and provide the required details.
Your username will be displayed publicly on all your event listings.
Please set your username as your official Company Name in lowercase without spaces to ensure brand recognition and professional credibility.
Ensure your email address is correct, as this will be your primary login.
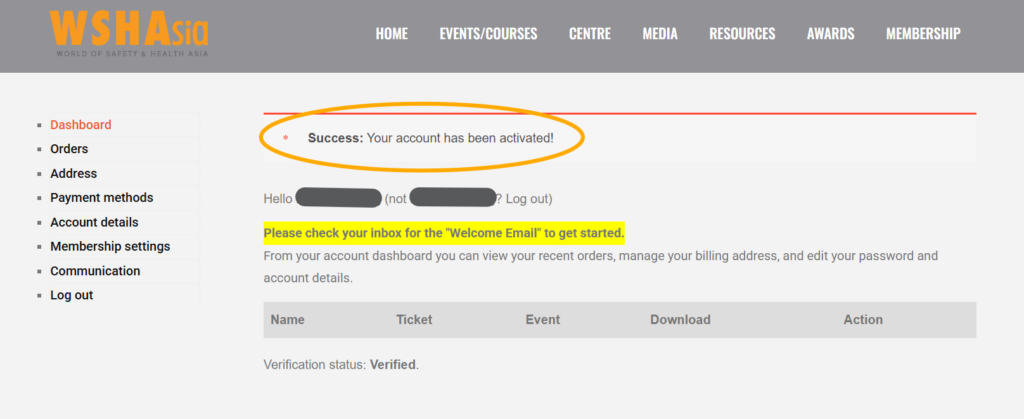
2. Verify Account
After registration, please check your inbox for a verification link.
Clicking this confirms your identity and activates your pending profile.
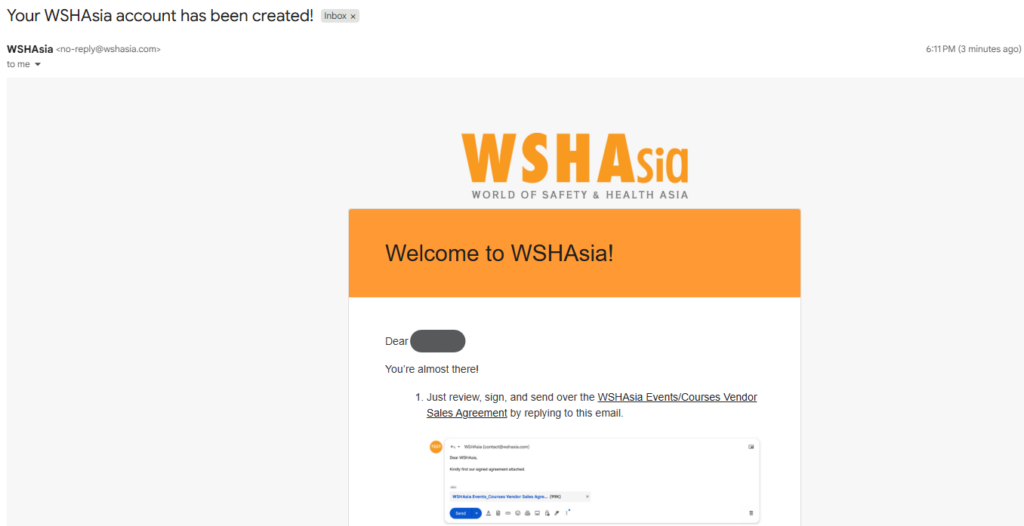
3. Receive Welcome Email
Once verified, you’ll receive an official welcome email containing the WSHAsia Events/Courses Vendor Sales Agreement and next steps.
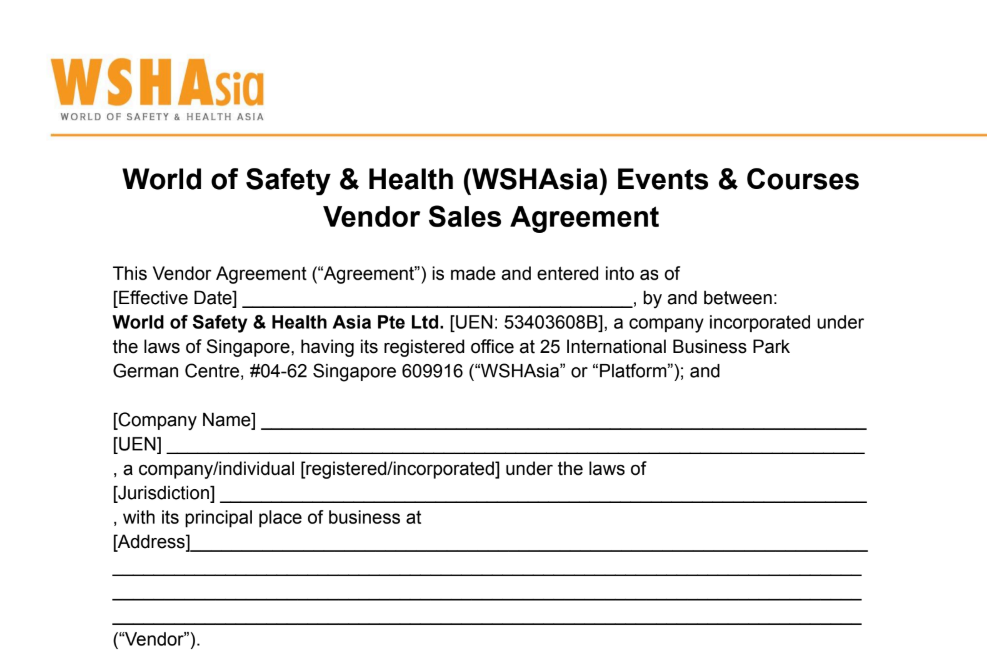
4. Sign & Submit Agreement
Review and sign the Agreement.
Please send the signed copy by replying to the email.
Note: Your account will not be fully activated until this document is processed.
5. Receive Access Confirmation
Once our team reviews your agreement, you will receive a confirmation email: ‘Vendor Access Confirmed – WSHAsia Events/Courses’.
You are now ready to log in and upload your events/courses!
Phase 2: Listing Your First Event/Course
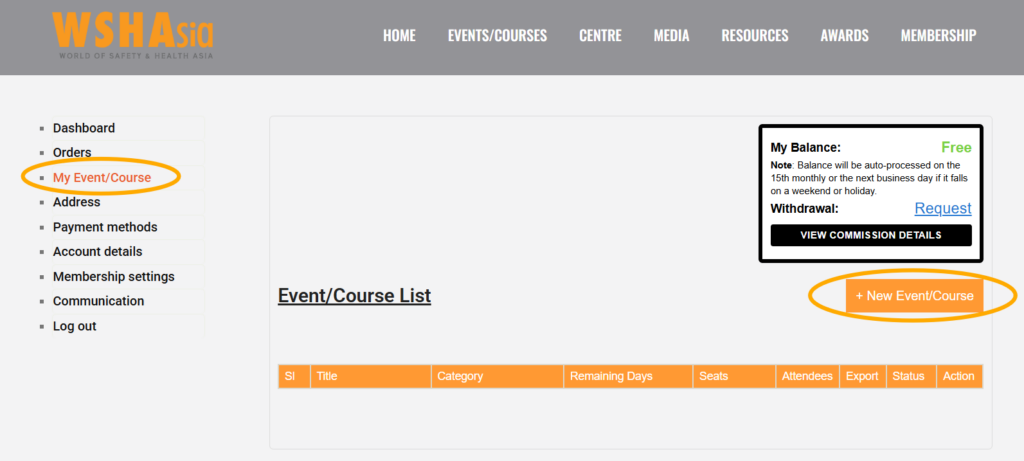
6. Login and Dashboard
Head to the portal and log in.
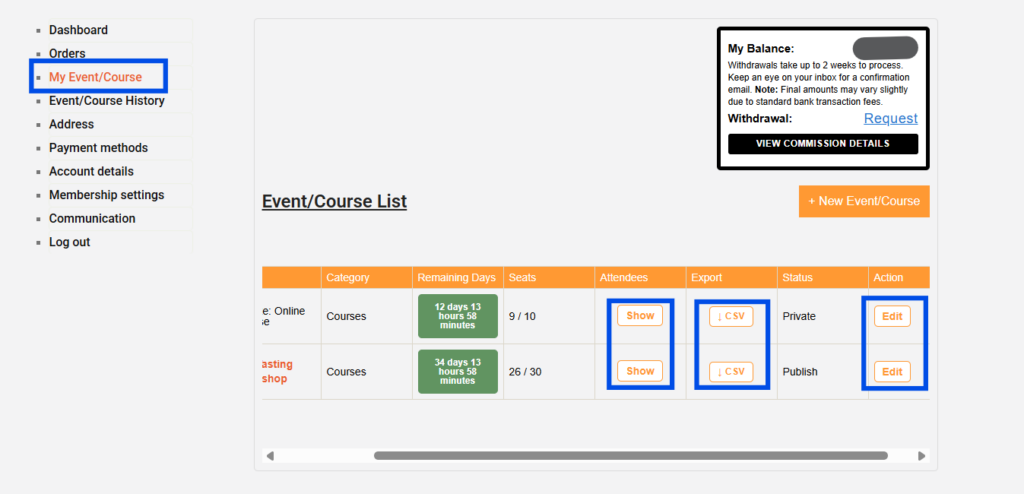
Once successfully in, on the left side, you will find the “My Event/Course” menu button.
Click on “+ New Event/Course” to start your listing.
7. Upload Events / Courses
Fill in the fields according to your event/course.
- Title: Use a clear, SEO-friendly name (e.g., “Advanced Safety Workshop 2026”).
- Description: Highlight the key learning outcomes, target audience, and any prerequisites.
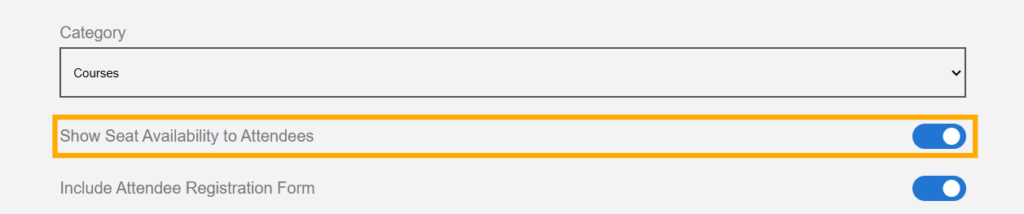
- Category: Select the right category for your event ‘Courses/eCourses/Events’
- Show Seat Availability to Attendees: Turn this off if you do not want attendees to see how many seats are available.
- Select Cover Photo: Please upload your event image in Landscape orientation at 1280 (W) x 720 (H) px in JPG or PNG format.
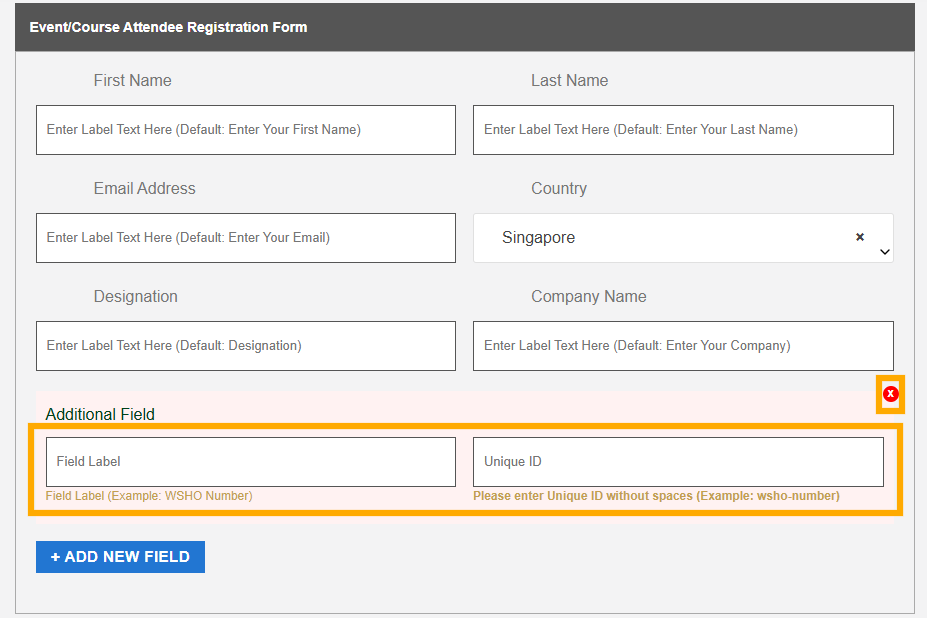
- Event/Course Attendee Registration Form: There are 6 default required fields. If you’d like to add more fields for the attendee to submit, please click “+ ADD NEW FIELD” and input the Field Label and Unique ID. The additional field will be required by default. To remove the additional field, click the “close” icon.
- Event/Course Venue:
The listings are set as In-Person events by default. Enter the full address of your physical event/course venue in the designated address fields.
However, if your event/course is held online instead, click the toggle switch to shift to a Virtual Event/Course mode. Input your online platform URL (e.g., Zoom, MS Teams, Google Meet) into the Virtual Event Details field. You may input more joining details if required.
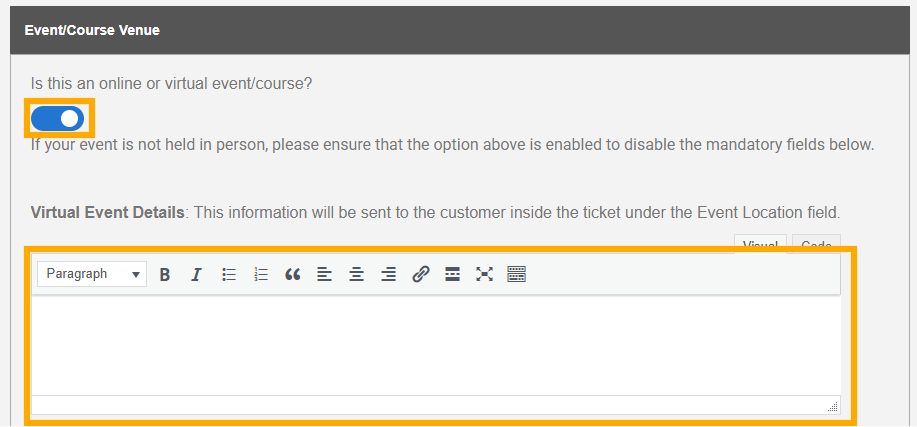
Once a customer completes their payment, the venue address or the virtual meeting link will be automatically included in the PDF Ticket attachment in their email.
- Event/Course Ticket Type and Pricing: Click “+ADD TICKET TYPE” to define your pricing tiers (e.g., Early Bird, Standard, VIP). The required fields include: Ticket Name, Price (SGD), and Tickets Available (the system will automatically mark your event as “Sold Out” once this capacity is reached).
For promotional rates, you may use the optional fields, Sale End Date and Sale End Time, to automatically expire Early Bird or limited-time offers.

- Event/Course Date & Time: Input your event’s start and end dates and times.
For programmes spanning multiple sessions, click “+ ADD MORE DATE” to list each occurrence separately.
This ensures all dates appear clearly on the event listing.
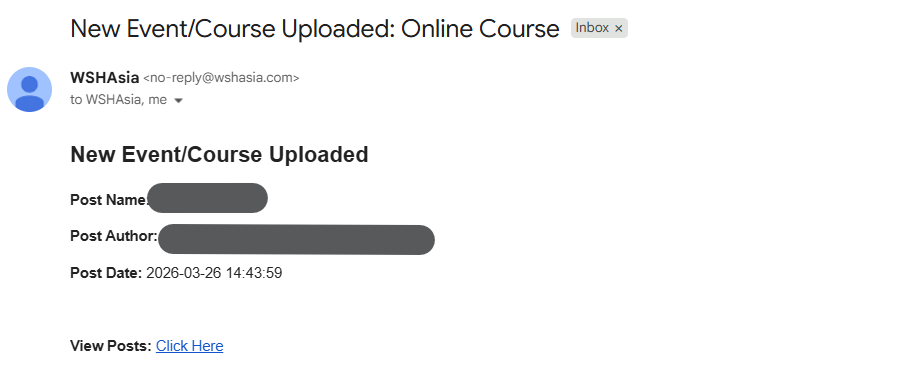
8. Confirmation
After clicking “Create Event/Course”, a pop-up will appear confirming the upload.
You will also receive an email titled “New Event/Course Uploaded”
Access your active listings at any time via the “My Event/Course” page. To update details or fix errors, scroll to the right of the specific entry and click the “Edit” button.
For attendee management, click “Show” to view the live registration list, or click “CSV” to download a complete report of attendee details for your records.
Phase 3: Managing Orders & Commission
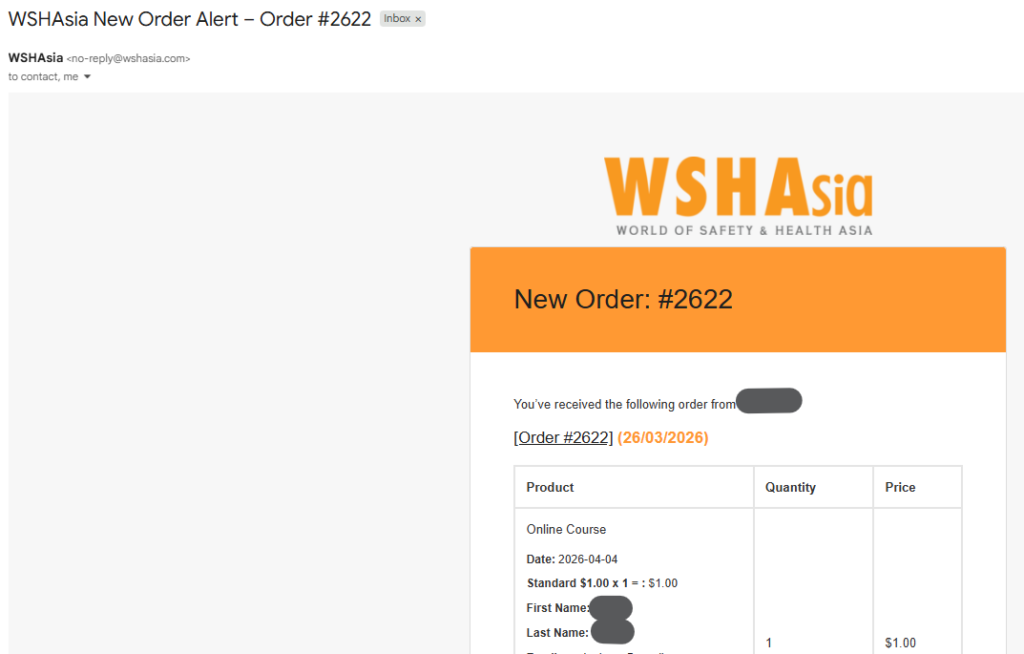
9. New Order Alert
When a customer purchases a ticket, you don’t need to check the portal constantly. You will receive an automated “New Order Alert Email” with the transaction details.
10. Commission Breakdown
Under the My Event/Course section, click View Commission Details. This will display a granular breakdown of tiered calculations and link each commission to its specific order.
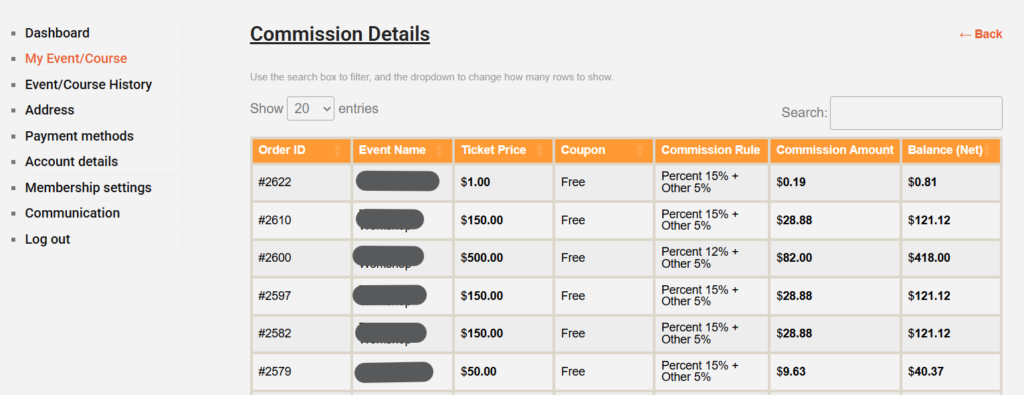
Vendor total costs involved = Tiered Commission + 5% Administrative Fee
The breakdown will show the commission rule, commission amount deducted, and your final balance.
Phase 4: Withdrawals & Payments
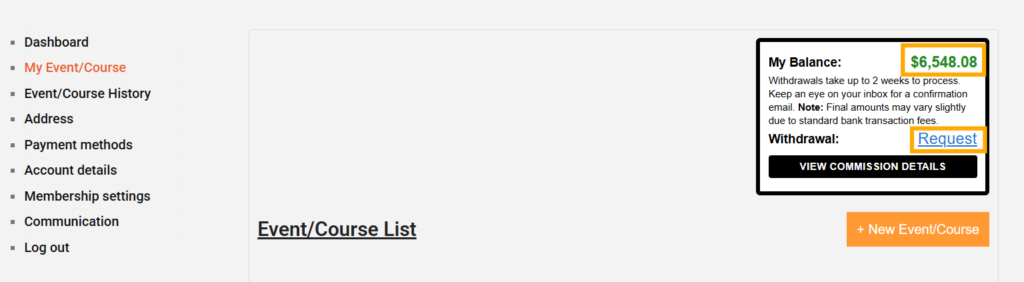
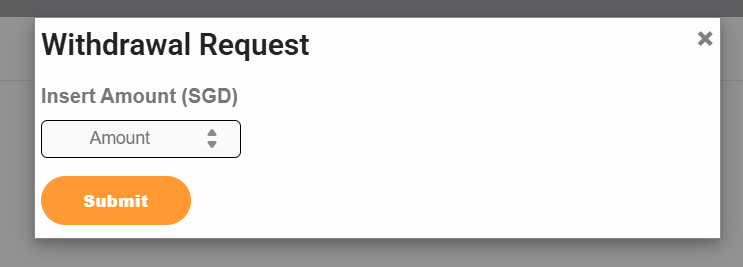
11. Submit Withdrawal Request
You can request your funds at any time once they are displayed under ‘My Balance’.
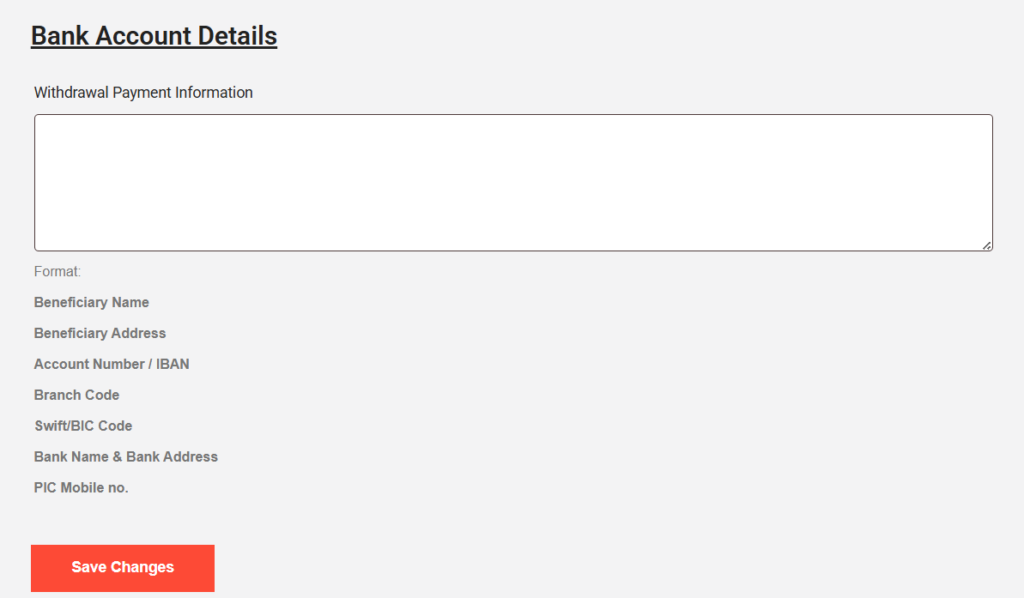
12. Initial Setup: Bank Details
If it is your first time withdrawing, you must input your bank details (SWIFT/BIC, Account Number, and Bank Name) under the Account Details menu button on the left.
13. Finalising Withdrawal
Once your bank details are saved, return to My Event/Course and submit your withdrawal request.
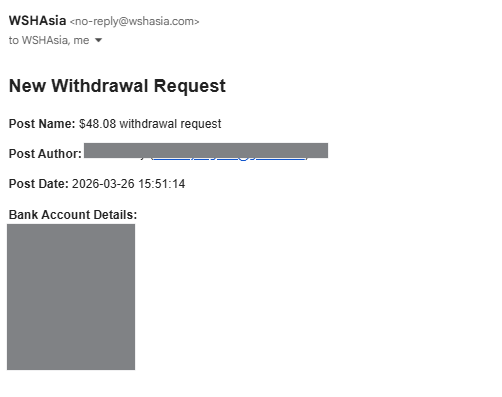
14. Confirmation
You will receive a “New Withdrawal Request” email. This acts as your receipt that the request is in our queue.
15. Processing Time
WSHAsia processes all transactions within 2 weeks.
- Note: The final amount hitting your account may vary slightly due to intermediary bank transaction fees or currency conversion rates.
Start listing your events/courses today and tap into a growing audience of OSH professionals!
25 International Business Park,
German Centre, #04-62,
Singapore 609916.
contact@wshasia.com
+65 6281 1106